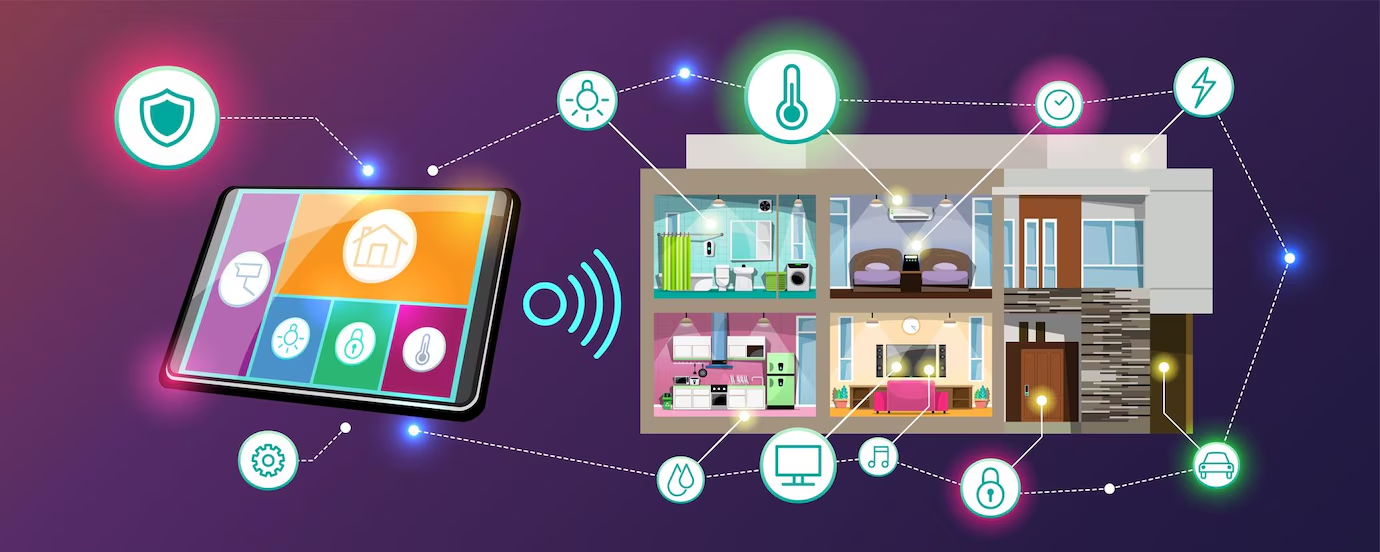
Ever dreamed of turning your room, lab, or classroom into a smart space where lights, fans, or even coffee machines respond to your voice or a tap on your phone? Welcome to your next big STEM adventure—building a home automation system with Raspberry Pi!

What You’ll Build
You’ll create a Raspberry Pi-powered hub that can control devices like:
- Lights
- Fans
- Appliances (with relays)
- Sensors (motion, temperature, light)
You can control everything from your smartphone or via voice (with Google Assistant or Alexa integrations).
What You’ll Need
- Raspberry Pi 3 or 4 (with Raspbian OS)
- Relay Module (4-channel or 8-channel, depending on number of devices)
- Jumper wires & Breadboard
- 5V Power Supply (for external components)
- Smartphone or laptop for control
- Optional: PIR Sensor, DHT22 Sensor, LED bulbs, buzzer
- Optional: Amazon Alexa or Google Assistant setup
- Home Assistant or Node-RED (optional, for advanced UI)

This project is ideal for a DIY Raspberry Pi STEM lab, tech lab for students, or a coding lab setup in schools—plus it teaches core IoT skills.
Wiring Example
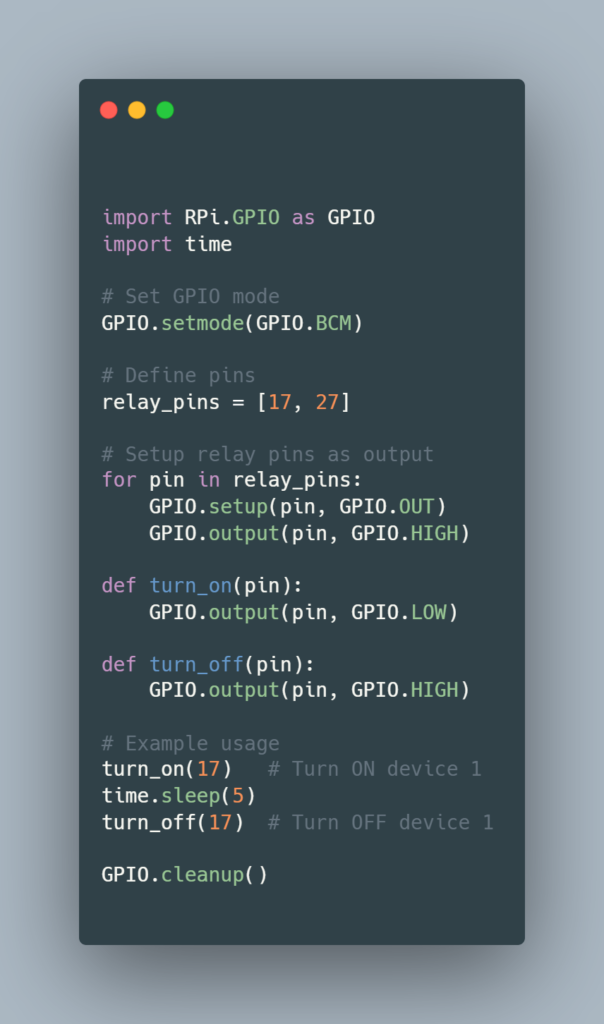
Relay Module to Pi:
- VCC to 5V
- GND to GND
- IN1 to GPIO17 (Pin 11)
- IN2 to GPIO27 (Pin 13)
- IN3, IN4… to other GPIOs based on how many devices you’re automating
⚠️ Safety Tip: If you’re switching high-voltage AC appliances, make sure you understand relay protection and use proper casing.
Basic Python Code
This basic code can be extended into a web app, smartphone interface, or integrated with AI assistants.
Web-Based Control (Flask)
Create a simple web server with Flask:
pip3 install flask
Then write a simple Flask app that toggles GPIO pins through buttons in your browser. Great practice for web development and educational coding with Raspberry Pi.

Voice Control Integration
Option 1: Google Assistant (via IFTTT + Webhooks)
- Set up Google Home routines with IFTTT
- Use IFTTT Webhooks to hit your Flask API
- Trigger GPIO changes with voice commands like:
“Hey Google, turn on the study light.”
Option 2: Alexa + Raspberry Pi + Node-RED
Node-RED is a visual programming tool that integrates beautifully with voice assistants.
Add Sensors
Integrate the following for automation triggers:
- PIR Sensor: Turn on lights when someone enters
- DHT22 Sensor: Turn on fan if temperature > 30°C
- Light Sensor: Turn off lights during the day
This boosts the intelligence of your automation system—making it perfect for STEM learning with Raspberry Pi and real-world IoT experiments.
Classroom Ideas
- Assign groups to different “rooms” or “functions”
- Create a mini smart classroom with automated lights and sensors
- Use as a case study in sustainable energy use
- Combine with Raspberry Pi-based STEM curriculum for IoT lessons
This kind of system not only teaches how to build a Raspberry Pi lab, but also shows students the future of smart homes and cities.
Learning Outcomes
- Core IoT concepts
- GPIO programming in Python
- Building user interfaces (Flask or Node-RED)
- Working with relays and sensors
- Voice assistant integration
- Real-world automation problem solving
Expand the System
- Add voice alerts using a speaker + Python pyttsx3
- Connect to a Google Sheet for logging device usage
- Add push notifications for motion alerts
- Create scheduling (turn on devices at certain times)
Final Thoughts
This Raspberry Pi for home automation project gives students real skills for the future. Whether you’re automating your room, lab, or entire classroom, it’s a fun and educational way to dive into the world of smart tech.
A perfect addition to your school makerspace ideas, this system is practical, extendable, and a showcase-worthy project.
Ready for the next blog? We’re moving on to Project #5: How to Build a Line-Following Robot with Raspberry Pi